
Use this workflow when you want to:
- Create a quotation from the Sales module.
- Add multiple freight rates and compare routes.
- Add Origin Charges, Destination Charges, Other Charges, or custom charge groups.
- Save repeated charge rows as templates for future use.
- Preview, download, print, or email the quotation.
Step 1: Create a New Quotation
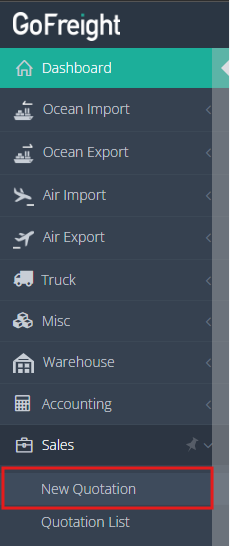
1. Navigate to Sales > New Quotation.
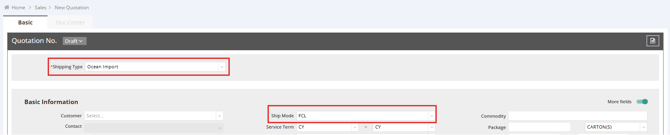
2. Select the Shipping Type.
-
- Once selected, the Ship Mode in Basic Information updates automatically.
- Note: After saving the quotation, the Shipping Type cannot be edited.
-
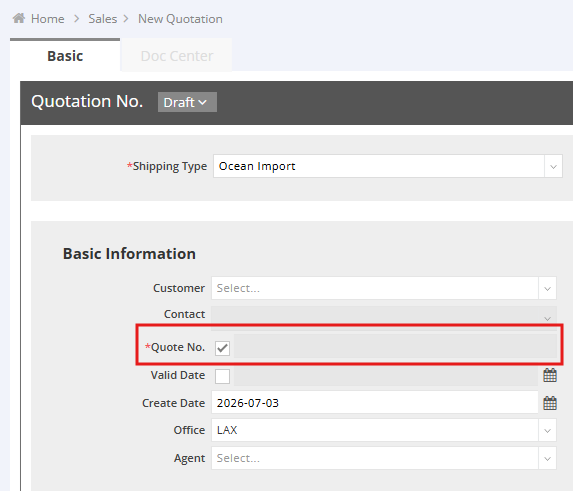
- The quotation number can be generated automatically.
- To enter your own quotation number, uncheck the auto-generate option and type it manually.
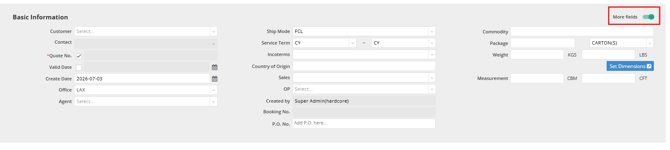
4. Enable More Fields if additional details, such as package information, are needed.
Step 2: Enter Cargo Details
For Air cargo, use Set Dimension to calculate volume weight efficiently.
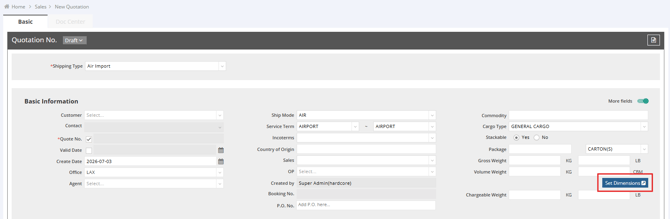
- Click Set Dimension.
- Enter the package dimensions: Length, Width, Height, and PCS.
- Confirm the calculated Volume Weight. Note that Gross Weight requires manual input.
- Click Apply.
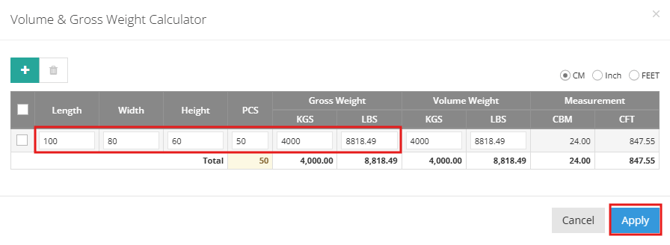
The chargeable weight syncs to the QTY (Quantity) field in the Freight Rate section.

Step 3: Add Freight Rates
1. Click the green plus (+) button to add a freight rate.-
- You can use +5 to add five freight rates, or use ++ to add multiple rates.

-
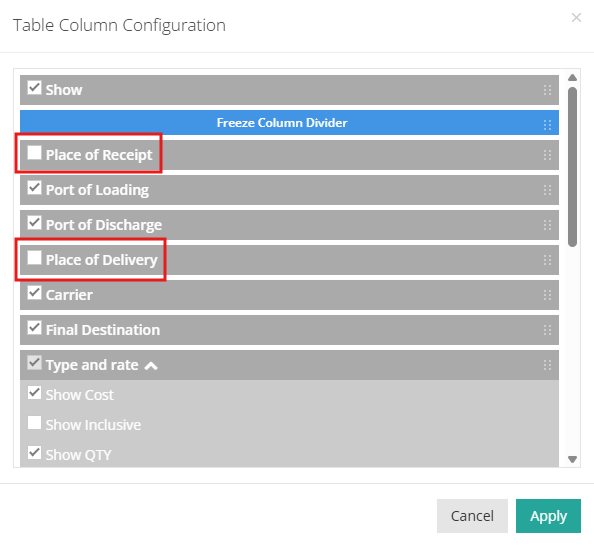
- Port of Loading (for Ocean Freight), Departure (for Air Freight)
- Port of Discharge (for Ocean Freight), Destination (for Air Freight)
- Final Destination
- Carrier


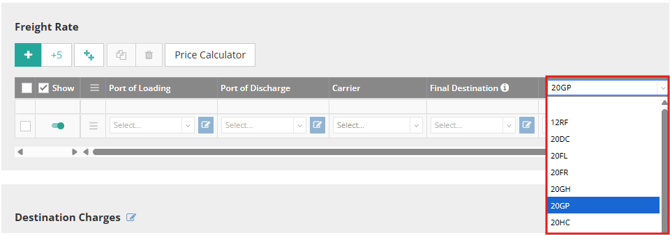
4. Select the Container Type.
5. Enter Quantity and Unit Price.
6. To add more container types under the same rate, click the plus (+) sign in the container column.


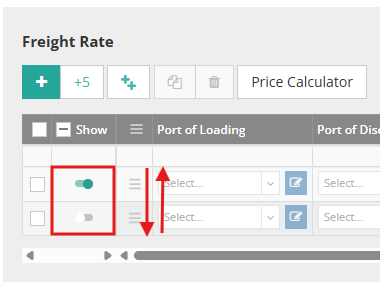
💡Tip: If you add multiple freight rates, you can reorder them or turn off Show to hide a rate from the quotation output.
Step 4: Add Destination Charges
Use Destination Charges to add local charges, trucking, handling, or other charges tied to a destination or location.
Example:
- Freight Rate Route 1: Shanghai to Los Angeles
- Freight Rate Route 2: Shanghai to Los Angeles, Final Destination: Reno, NV

- Charge Group 1: Origin Local Charge AMS Service - Shanghai
- Charge Group 2: Destination Trucking Service - Reno, NV
To add destination charges:
1. Go to the Destination Charges section.
2. Enter the charge details to create the first charge group.

3. Click the small gray plus button to create another Destination Charges Group.

4. Click the Edit button to modify the group title and location.
5. Enter a clear title and select the correct location.

Step 5: Add Charge Rows and Choose How Amounts Apply
1. Click the green plus (+) button inside the charge group.
2. Select the Freight Code.
3. Edit the Freight Description, Unit, Quantity, Unit Price, and Unit Cost if needed.
4. Select how the amount should apply to the freight above:
-
- All: Applies the amount to all container fees automatically.
- Separate: Applies the amount to the necessary container fees separately in the summary.

5. Check Include in Summary only when the charge should be included in the freight rate above instead of shown as a separate charge.

After entering the charges, review the Summary section to confirm the calculated subtotal and total.

Step 6: Save Reusable Charge Groups as Templates
If you frequently use the same charge groups for repeat customers or similar routes, you can save these charge rows as a template.
To save a charge group as a template:
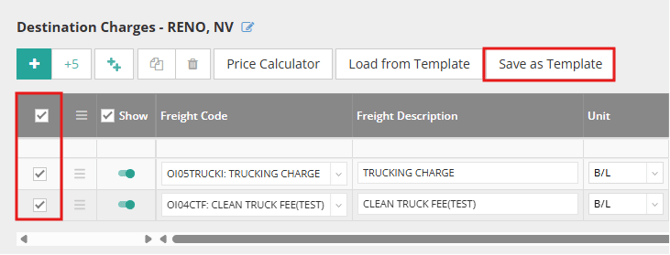
- Navigate to the charge group you want to reuse.
- Select the charge rows you wish to save.
- Click Save as Template.
4. Fill in the template information:
- Name: Enter a clear template name, such as RENO DESTI. CHARGE.
- Description: Add a brief description of when to use the template.
- Freight Code: Confirm the billing code for each row.
- Freight Description: Review or enter the charge description.
- Unit: Select the unit.
- Currency: Select the currency.
- Type and Rate: Enter QTY, Unit Price, and Unit Cost.
5. Click Save.
Note: The template must contain at least one row before it can be saved.

Step 7: Load a Saved Charge Group Template
Use Load from Template to add saved charge rows to a quotation without copying an entire quotation.

- In the target charge group, click Load from Template.
- Select a template from the left panel.
- Or, use the search field to quickly find the template if needed.
- Review the saved charge rows in the right panel.
- Check the rows you want to load.
- Click Apply.

The selected rows are added to the end of the charge group. You can reorder the rows after they are added.
Important System Behavior:
- Destination Charges Templates are saved per user. Other users will not see your templates.
- The Destination Charge Template list refreshes each time the quotation file opens. If a template is created in another tab, close and reopen the quotation file to see it.
- If no rows are checked in the Destination Charge Template, the system will prompt you to select at least one row before applying.
- If a row in the Destination Charge Template uses a Freight Code not allowed in the quotation shipping type, the system will skip that row.
Step 8: Review the Summary
The Summary section helps you confirm the quotation before saving or sending it.
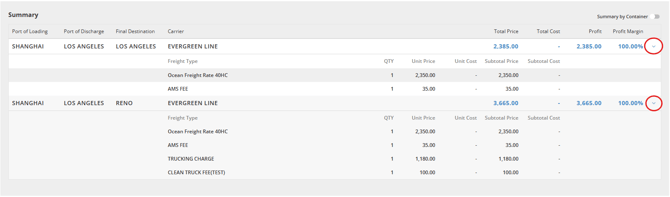
- Review the freight rates and additional charges in the Summary section.
- Click the V icon to expand the details.
- Confirm the Freight Description, Quantity, Unit Price, Subtotal, and Total.
- Ensure destination charges and inclusive charges are applied correctly.
Step 9: Save, Preview, and Send the Quotation
- Click Save.
- Click Preview & Email.
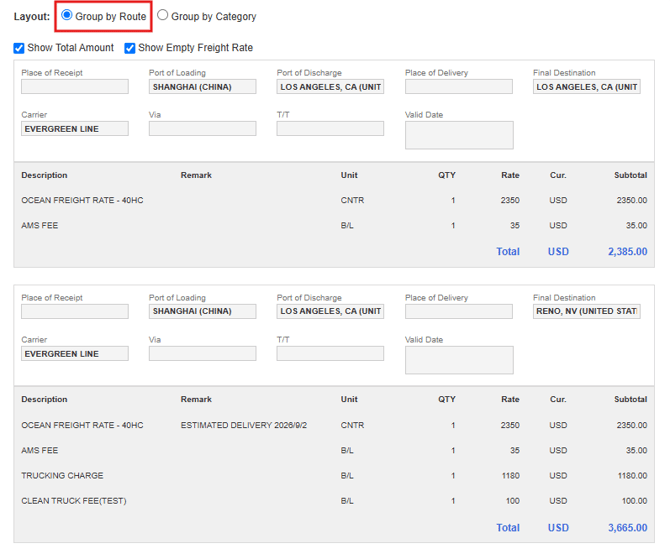
- Select the layout option Group by Route if you want the quotation to display prices by route.
- Check Show Total Amount if you want to show the total amount for each route.
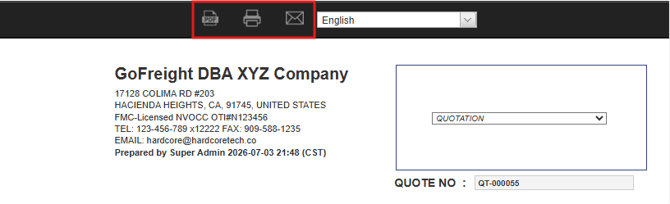
5. Use the available icons to:
- Download PDF
- Send Email
You might also be interested in:
- How to Configure Quotation Items?
- How to Generate and Print Quotation Documents?
- Quotation Status