
This feature allows you to assign different names, addresses, or languages to the same Trade Partner on various accounting forms.
Print Address 1 is the default address. You can add up to three additional addresses (Print Address 2, 3, and 4) and specify which forms should use them.
Before You Start
- Ensure you have permission to edit Trade Partner addresses.
- Without this permission, you can view but not modify the addresses.
- Each Trade Partner can have a maximum of four print addresses.
How Print Addresses Work
Print Address 1
Print Address 1 serves as the primary address.
- It cannot be deleted.
- Forms default to using Print Address 1 unless another address is specified.
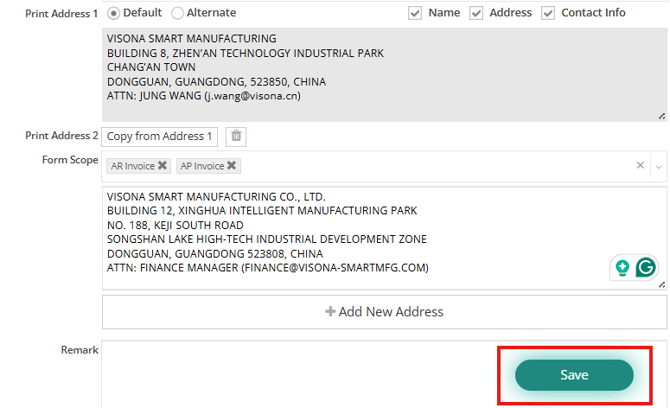
- You can choose to display the Name, Address, and Contact Info when the Default display is selected.
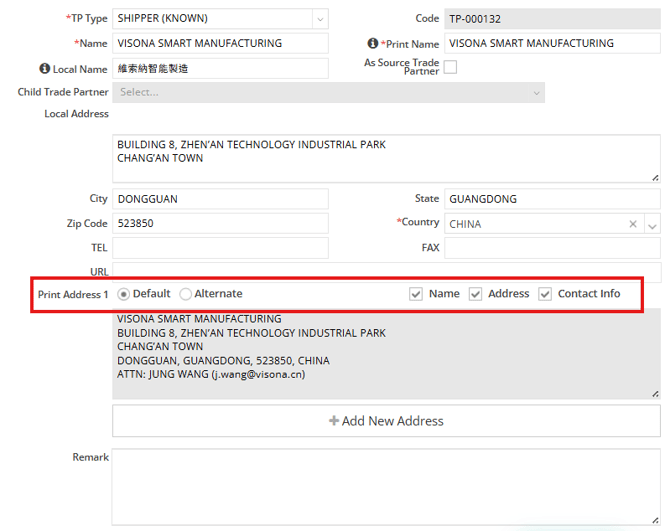
Print Address 2, 3, and 4
These additional addresses are used when a form requires different information than Print Address 1.
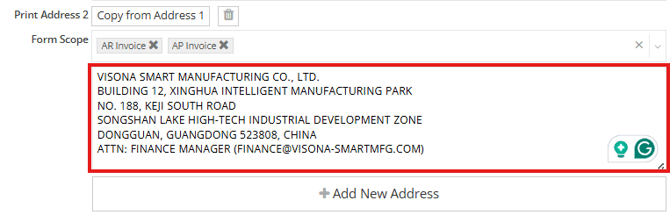
- In Print-out, enter the exact text you want displayed on the form.
- Click Copy from Address 1 to start with the same text, then edit as needed.
- In Form Scope, select the forms that should use this address. If left empty, no forms will use this address.
- Ensure all necessary information is included in Print-out, as these addresses do not have separate options for Name, Address, or Contact Info.
Add a Print Address
1. Open the Trade Partner you want to update.2. Locate the Print Address section.
3. Click Add New Address.
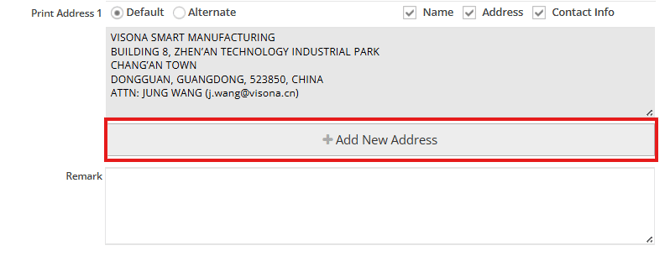
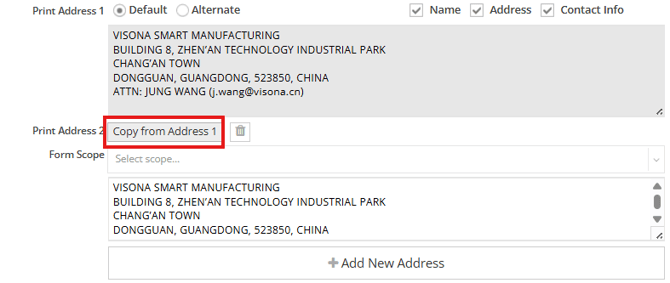
✏️Note: Select Front Desk Receipt only if your company prints receipts from the Front Desk Portal. As this is currently a beta feature, please leave this option unselected unless instructed otherwise by the GoFreight team.
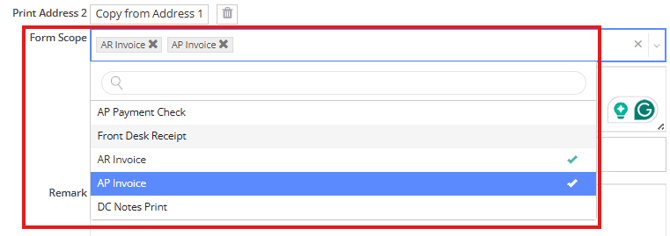
6. In Print-out, enter the exact text you want to print.
Choose What to Enter in Print-out for Each Form
- AP Payment Check: Enter the vendor address only. GoFreight automatically adds the vendor company name.
- Front Desk Receipt: Enter the address only. GoFreight displays the Trade Partner name separately. (Beta feature; do not use it for now.)
- AR Invoice: Enter the company name and address exactly as you want them to appear.
- AP Invoice: Enter the company name and address exactly as you want them to appear.
- DC Notes Print: Enter the company name and address exactly as you want them to appear.
📌Important: Do not enter the vendor company name for AP Payment Check to avoid duplication on your check. Use a different Print Address if another form requires both the company name and address.
✏️Note: There is no G&A option under Form Scope.
- For a G&A Invoice, select AR Invoice.
- For a G&A Expense, select AP Invoice.
Move a Form to Another Print Address
Each form can use only one additional print address at a time.
If you select a form already assigned to another print address, GoFreight will prompt you to confirm the move. For example, if AR Invoice is selected in Print Address 3 but is already assigned to Print Address 2, you will see the following message:
Reassign Form — Move AR Invoice from Print Address 2 to Print Address 3?
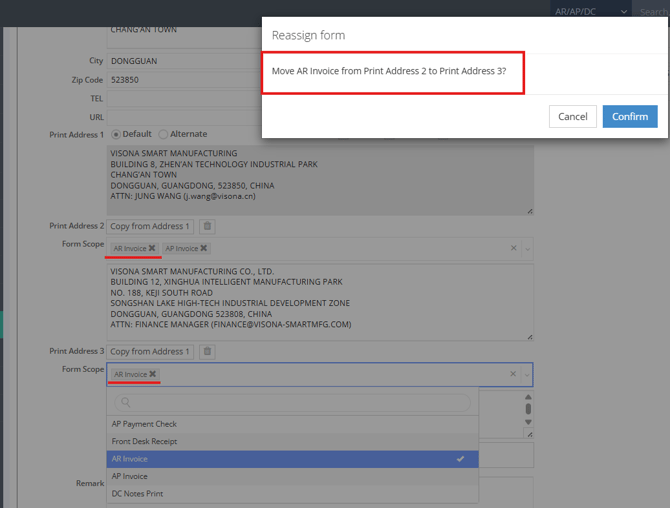
- If you confirm, the form moves to the new print address, and GoFreight copies the text from the previous address. Review the text before saving.
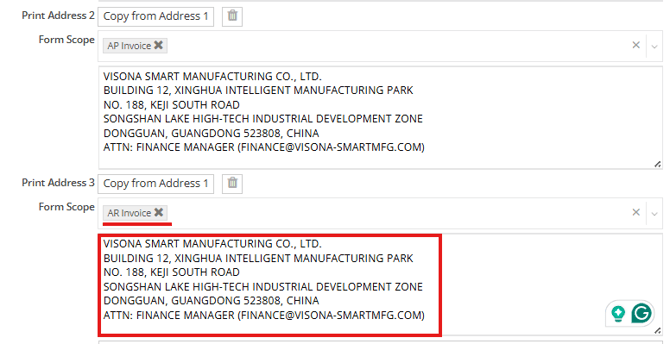
- If you cancel, the form remains with the original print address.
Delete Print Address 2, 3, or 4
Before deleting an address, GoFreight will indicate which forms will revert to Print Address 1. In the following example, the user is trying to delete Print Address 3 by clicking the “trash can” icon.
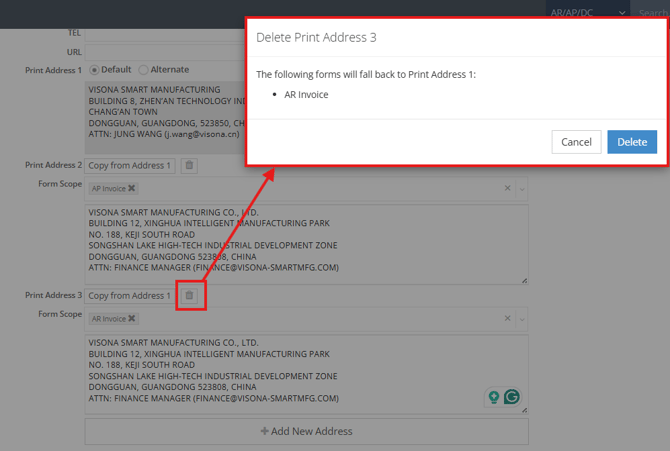
After deletion and saving, those forms will use Print Address 1 and will not automatically move to another additional print address.
Practical Example Scenarios
Scenario 1: English AP Check and Chinese AR Invoice
- Print Address 1: Your office main address
- Print Address 2: English address only; Form Scope = AP Payment Check
- Print Address 3: Chinese company name and address; Form Scope = AR Invoice
This setup ensures that the company name does not appear twice on the AP Payment Check and allows the full Chinese name and address to be printed on the AR Invoice.
Scenario 2: Using the Same Address on Multiple Forms
If you want the AR Invoice, AP Invoice, and DC Notes Print to display the same company name and address, follow these steps:
- Add a print address slot.
- Enter the company name and address in the Print-out section.
- Select AR Invoice, AP Invoice, and DC Notes Print in the Form Scope.
- Click Save.
Other Important Information
- Only forms listed in the Form Scope can utilize Print Address 2, 3, or 4.
- House Bills, Master Bills, Air Waybills, Arrival Notices, Delivery Orders, filing forms, and other shipment forms will continue to use Print Address 1.
- Bulk Trade Partner import does not support adding Print Address 2, 3, or 4. These must be added manually from the Trade Partner page after the Trade Partner is created.